Saturday, 23 February 2013

Altered Art

Very exciting at college this week. We were encouraged to divide our work into 'final'  & 'draft' folders. Well, I'd run into the shop on the way to buy milk & met my lift share college buddy & hopped straight into her car, leaving my 'book bag' in my car fully exposed to all & sundry.


I had 3 original plates, a couple of finals & about 10 draft pieces in the bag. (this is Skye you know ;) I must drive my teachers mad but luckily I had left a couple of pieces  to dry at the college. So, once we'd sorted things out, we were encouraged to work into our draft pieces with....inks, pencil, colored pencils, gold markers & watercolor.


 I really couldn't believe I was being given permission to play & to make a pretty mess, Fabulous! These first 2 pics are a gloopy first print like the 3rd image from last week. What a difference a bit of doodling makes. I was excited to leave white in the one above & stitched at home on the top one. I mean, mounted up nicely I could well have a couple of saleable works.


This one above was the one & only intaglio print I'd done - (my bag was still there on my return so I can make some more ;) Watercolor washes, then white ink which looked a little thin to me so I added gold acrylic at home using a satay stick & the edge of a card, oh my! See here for the original print, scroll down to 3rd from the bottom - just black on white.


 Above was a clean up print with a wash of ink, scribbled on with pencil then terracotta  & blue pastel here & there. Original same link as above, half way down the post.   Might keep this one ;)


 A black & white altered with plum ink, pencil swirls & blue & plum pastel. Original again the same link as above, 3/4 the way down.. Well, just up my street all this, really.


 Above is another  attempt at stitching from the back round a heron shape, then cutting carefully around the fabric on the front side, but it looks a mess & I'm doing myself no favours having such an uneven surface. I may have to try using the  'slip' method, read about inWorkshop on the Weban article by Stephanie Redfern. Her blog is great & she's just gone wonderfully colorful. Not sure if she mentions the slip method on her blog at all.


Last but not least is our new addition to the family, Willow. We've been cutting willows back & it seemed right when we saw this little thing peering out of the Cat Protection basket. She's 4, an older lady who was feeding her moved in with her son &  having the mother was enough, apparently, so she's not been abused, just abandoned. We wondered about putting our 18 yr old Sconser under stress, but she's completely in charge & we really need something to chase the mice & rabbits away. If you're wondering, she's very happy & secure in the bath !

Saturday, 16 February 2013

We interupt this program


 For a tribute to Valentine's day, well it had to be done ;) Above is my card to him & below his card to me. Lovely.


 Note that on my card to him there's a little bit of experimental fme.

 Above is college work - this is the actual plate of an experimental collograph. It's amazing to see what texture comes out which way. Lots to learn. Below is the second pull on wet paper. The first was so gloopy with ink I left it behind along with a couple of others to dry.


the next 3 pics are plate clean offs


 Below is some drawing into the last of the rolled out ink. We need to get 2 'perfect pieces' done over the next 4 weeks to hand in, having chosen 2 of the techniques - no thumb prints or blobs of ink, never mind which image to choose...it's that word perfect that gets me ;(


Had a go at some rust dyeing in fabric. I'd forgotten I had Cloth paper Scissors 'Surface Explorations' & it was an article in there. Sorry no link.


 24 hours was suggested but I didn't get back to my trays of fabric for 4 days! I know most people CAN'T WAIT to open their bundles. These are a little over cooked but I'm 'well pleased'!

 I couldn't waste the rusty juice in the trays but how do you neutralise just printed paper?

So, onto the hearts proper. I seem to have lost the ability to free machine stitch. I did a super quick 'sample' & made it into a card on Wednesday, having painted loads of hearts earlier that day. But from then on all my machine would let me do while free machining was sound like it was having a heart attack (hmmm)  or a car back firing, the gold thread would magically re thread itsself thru the needle twice - it's all I can do to see the eye to thread it the first time & leave me with a classic birds nest underneath. I changed the needle, I actually found a hoop....me! I changed the thread, then I looked under the plate, having decided to work step by step thru the manual, even tho  no where mentions fme, just darning. Oh boy, someone on line said a tiny bit of fluff might do it, well, I had a forrest of the stuff - nice & clean now, still birds nests. Could it be after all these years I may be winding the bobbin the wrong way round? Jury's out on that one ;)


 So the 4 hearts pic above the above are cards, well, will be.  about 2x2" The 6 here were meant to be a beautiful 21 or so heart wall hanging with lots of gold foil, see the burnt out bit top left, looks better on the card - lots of fme lots of layers.


So here's the rest to work on, Brusho ink painted white cotton ish stuff - I don't like the more insipid ones as much but there'll eventually be more cards, 15 more of the bigger  hearts, about 3 x 3" a cuff or 2, brooches & a book cover bottom middle there. It will still happen, one day, the darning foot facility works fine...generally. Maybe the neighbor up for the w/e using his chain saw next door  didn't help...

Saturday, 9 February 2013

Late in the day

I'll be brief as I've left it late in the day ;) Brief, moi?

College stuff first. After struggling with scratching/sketching on perspex I found mono printing with watercolor very relaxing. Now I want my very own set of watercolors....as if there's room in my studio for more! (but I need them)

  a poppy field but a little washed out

 second pull, more impressionistic, like this one ;)

 My attempt at abstract, hmmm. Difficult to get the paper damp enough & the paints not too wet!

Below is a drawing on slate found on the shore using an awl, much easier! Teach reminded me I might be able to take a print, of course - I was just excited about being able to make a mark ;) Might etch a little deeper tho - it's not as feint as it looks here. I'll practice the watercolor monoprinting, it was fun to do.


 Above is part of my registration sheet & some card used for wiping ink onto the etching plates must have got stuck on to the back of it. What fabulous marks have soaked thru! It's gone into my sketchbook for now but will probably be the first found mark in my marks book..when I've made it ;)


The results from last week - why does the program I use for cropping sometimes make them blurred? 3 angles of the cuff 


below 2 little 3 x 1" snippets I'm keeping for a rainy day

 2 even smaller patches  I made from collecting from around my desk...for my shoes! (remember those?


 one side of the purse - Day


the other side, evening ;) A button made from one of the corners


A sample piece - good thing I'm practicing; a wonky organza moon & a pretty strangulated heron - doesn't help if you can't see the drawing you've made on the back to stitch from & the DH said my trees are like seaweed..very good seaweed!

 Looks a little like an African mask, earthy colors even tho it's meant to be evening sky with sunset...

The book turned out ok, about 4 or 5 " by 6 or 7". I may make tassles for the ends of the cord - see they're wrapped around the second 'corner' button. It'll be better when I've stitched some pages in ;)


Pleased with the brooches, they're abut 1 1/2 by 1 1/2


 & some cards, about the same as the brooches but not tidied up, sort of a colorful Boro look (now there's another idea - using the needle felting machine gives a lovely disintegrated, old patched feel, what else could I make, I wonder?)  I don't normally hand stitch on cards but I had a coffee with my textile buddy & I stitched as we chatted. I'm enjoying this new found relaxing embroidery time, either while having a chat or watching East Enders...as long as I don't get in a tangle, can find my scissors, can see properly & the dog doesn't lay on my threads. Work is still progressing on the actual hangings......so much easier to do the smaller functional things. There, finished!

Saturday, 2 February 2013

Still on the terrracotta & blue theme


 Ok, it's still just a pile of unfinished work, but I'm moving on....slowly. The 3 small pieces at the top of the pile if you can see them are a sample for the sketchbook, behind that a 'spare' piece & behind that a smaller piece, that will become 2 brooches. Underneath those is a book cover, a purse & cuff sized piece & below those are 2 hangings to be, one with a half moon, heron & trees to be thought about the other, well, without ;) I should have looked up in Thesaurus for an alternative to 'piece'. I do hate repeating one word 4 times in a paragraph.


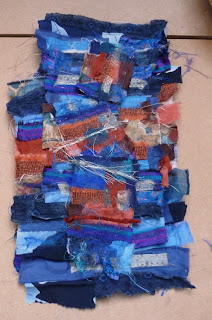
The most exciting achievement this week is that i have finally got my very own 'hand dyed' cloth! see above Oh, my, I've joined the big boys! How I've longed to be a dyer, I've managed a bit of rusting here & there, but the word 'procion' fills me with horror. But, I found myself thinking, 'I don't have enough of the right blue in my collection of recycled fabrics' & I answered myself, well I can use silk/fabric paint. OK so I know it's not real dyeing but it's close, using what I have ;)

I brought it painted & dripping  into the house to drape over the Aga & horror of horrors thought I'd either made a mess on the (very clean) oven door (it is a turquoise Aga tho, ...of course) or burnt it, as it stuck to the door. I didn't realize if you 'applied heat directly to 'dyed' cloth it drew the color to that spot so, while he wasn't looking I roughly folded the cloth & put it on the warm plate under the weight of an oven glove & left it.....he didn't notice. & the above happened. Nobody anywhere has said you could use an Aga for resist dyeing!  Half of it, a piece of cloth about 5 x 12 has gone into my 'pieces' & I've just noticed the look of a stand of birch trees..... Can you tell I'm excited?

 Anyway, here are a few pic that were drying from my class last week. Do just scroll thru quickly!

 Chine Colle


 I'm not normally one for 'seeing things' but there's definitely an otter swimming in my clean up print!

 More turps
 using up ink
 cleaning rollers
 more ink cleaning
 more turps. Some wonderful makrks

one of the other students lino cuts, wish I'd done a tree!

 We did  lithographs in perspex this week. Boy, I thought I'd found a new career, with perspex being accessible & no acid involved, & just a sharp tool but apart from the teeth itching noise I could barely scratch the surface without wanting to wearing wrist, elbow & hand supports! It is my very first time, scratching - I couldn't call it sketching - for a lithograph, but still, my 'sampler'  which is laying on it's side with exhaustion, looks like it's been done by a 5 yr old, very naiive ;(


These above are by 2 other students, lovely, the nude was traced directly onto the perspex from a book, but still! As the DH said, 'very different' to mine. It was fun, tho. Right, off to stitch into those pieces!